
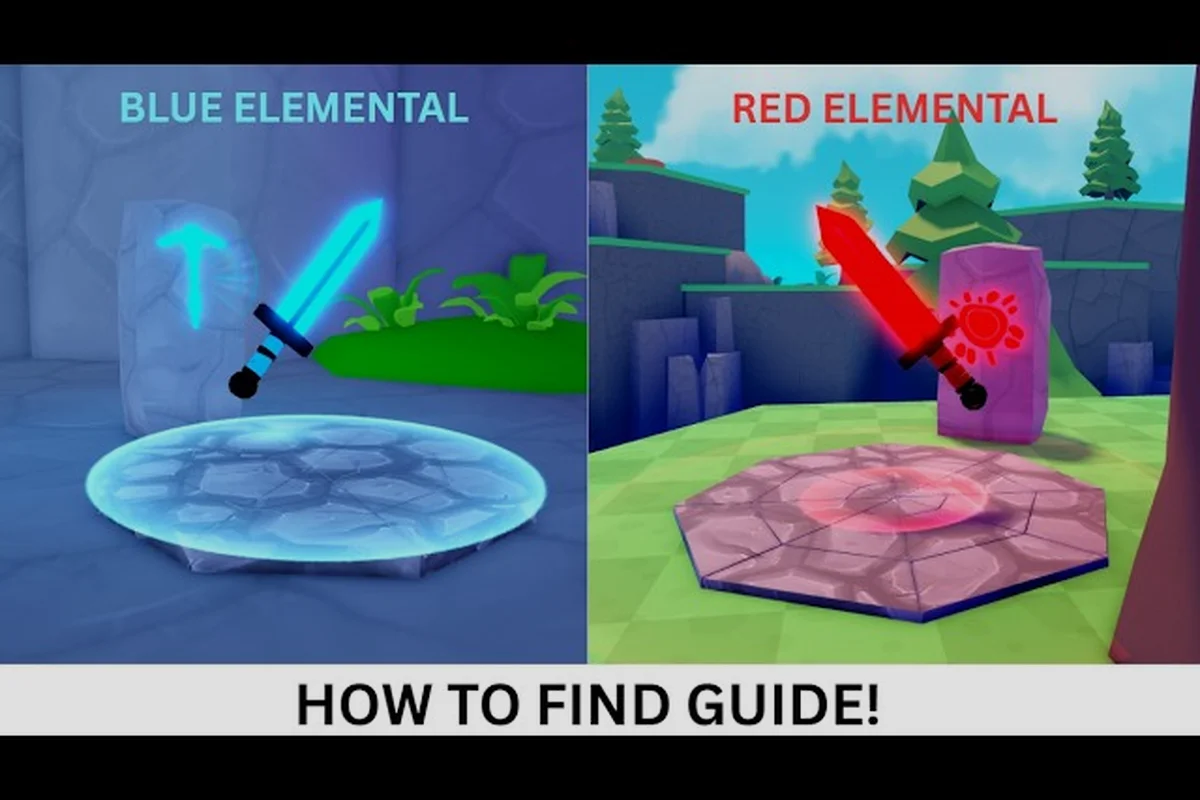
Tracking down every elemental in Poly Loot is one of the first real progression walls most players hit, because each one gates a unique sword and a chunk of mid-game power. The poly loot all elementals lineup covers five distinct spawns: Red, Blue, Green, Holo Red, and Holo Blue, and community-tested routes show they are not just recolors. Each sits in its own shrine-style arena, and skipping even one leaves a sword-shaped gap in your loadout. This guide pulls together every verified spawn, the shrine steps players use, and the themed weapon each elemental drops.
Elemental Spawn Roster at a Glance
Before running across the map, it helps to know exactly what you are hunting. Community videos from creators like Vortex Shadow and Red dragon vr document five working elemental spawns, and the Holo variants are separate encounters rather than upgraded versions of the base elementals. Treat them as five independent hunts and plan your route accordingly.
| # | Elemental | Type | Sword Drop | Approx. Tier |
|---|---|---|---|---|
| 1 | Red Elemental | Base | Red Sword | Mid-game |
| 2 | Blue Elemental | Base | Blue Sword | Mid-game |
| 3 | Green Elemental | Base | Green Sword | Mid-game |
| 4 | Holo Red | Variant | Holo Red Sword | Late mid-game |
| 5 | Holo Blue | Variant | Holo Blue Sword | Late mid-game |
The base trio (Red, Blue, Green) is normally run together because their shrines sit in the same general biome cluster, while the Holo pair lives on the opposite side of the map and is best saved for after you have decent stamina. According to community data shared across recent guide videos, the most-watched community route covers Red and Blue in a single run, which trims roughly five minutes of travel compared to doing them separately. Green is the odd one out and benefits from a side trip.
What Makes Holo Variants Different
Holo Red and Holo Blue are not simple reskins of their base counterparts. They spawn in separate arenas, have their own visual filters, and drop a holo-tier sword that does not exist in the base set. Community reports from the Vortex Shadow guide note that the holo shrines also require one extra activation step before the fight begins, so plan to spend an extra 30 seconds at the altar.
Red and Blue Elemental Locations
The Red and Blue shrines are the natural starting point for any elemental route because they sit closest to the spawn area and have the cleanest pathing. Most players knock them out in a single run before pivoting toward Green or the Holo variants. The Poly Loot Blue Elemental Location guide maps the Blue shrine in detail if you want the step-by-step with screenshots.
Red Elemental Route
To find the Red Elemental, head east from spawn until you reach the cracked stone bridge, then drop down into the lower lava channel. The shrine entrance is a half-buried arch on the north wall of the channel, marked by two torches that are unlit until you approach. Light both torches, interact with the altar at the back of the small chamber, and the Red Elemental spawns on the raised platform in front of you.
| Step | Action | Notes |
|---|---|---|
| 1 | Travel east from spawn to the cracked stone bridge | Avoid the patrolling mini-enemy on the upper ledge |
| 2 | Drop into the lava channel below | Take fall damage, you will not die |
| 3 | Locate the half-buried arch on the north wall | Look for the two unlit torches |
| 4 | Light both torches to open the shrine | Either torch works first |
| 5 | Interact with the altar at the back | Spawns the Red Elemental on the raised platform |
| 6 | Defeat the Red Elemental to receive the Red Sword | Drop is automatic, no roll required |
The Red Sword deals solid mid-tier damage and has a small chance to apply a burn proc, which is useful for softening tougher mini-bosses while you work toward the holo weapons. The red shrine is also a reliable early source of shrine-themed loot, so even if you already own a better weapon, the chest reward makes the detour worth it on a fresh character.
Blue Elemental Route
The Blue Elemental shrine sits west of spawn, hidden behind a waterfall that only loads in when you are within 20 studs of the alcove. Walk past the waterfall, climb the two stone steps, and place your hand on the frost-marked altar to begin the encounter. Compared to the Red shrine, the Blue arena is more open, which makes the fight easier to learn but also easier to overextend in.
Players hunting the poly loot all elementals roster for the first time should pair Red and Blue into one continuous run, because the cracked bridge and the waterfall alcove are roughly equidistant from the central hub. According to the community video by Vortex Shadow, doing them back-to-back cuts total travel time by about a third compared to running them on separate sessions.
Green Elemental Location and Shrine Steps
The Green Elemental is the most commonly skipped base elemental, partly because its shrine sits in a less-traveled biome and partly because the activation requires an extra step that trips up first-time runners. It is, however, well worth the detour because the Green Sword offers a unique poison proc that neither Red nor Blue can match.
| Step | Action | Notes |
|---|---|---|
| 1 | Travel south from spawn to the moss-covered ruins | Look for the tall broken pillar as the landmark |
| 2 | Find the three vine-covered stones in a triangle | Each one needs to be interacted with |
| 3 | Pull the center vine to open the shrine entrance | The vine resets if you let go too early |
| 4 | Step onto the leaf-carved altar to summon the Green Elemental | A short vine-growth animation plays first |
| 5 | Defeat the Green Elemental for the Green Sword | Poison proc lasts 4 seconds on hit |
The Green sword's poison proc is the main reason to prioritize this shrine. It stacks with most status effects and makes the weapon surprisingly effective against the spider-shaped mini-bosses in the south biome. Community testing posted in the Red dragon vr route video shows that a single Green Sword proc can clear most low-tier mobs in two hits, which speeds up the grind toward the holo weapons considerably.
Holo Red and Holo Blue Variants
Once you have all three base elementals cleared, it is time to tackle the holo variants. These two fights are the actual endgame check for the elemental system, because their arenas are larger, their attacks are faster, and the swords they drop are the highest-damage elemental weapons in the game. The Poly Loot Holo Blue guide covers the Holo Blue side in more detail, including a side-by-side with the base Blue sword.
According to Vortex Shadow's Holo Red and Holo Blue location walkthrough, each of the five elemental spawns is tied to its own arena and drops its own themed sword, which is why the holo pair is treated as a separate hunt rather than a variant roll.
Why Holo Encounters Are Separate
Holo Red and Holo Blue are not upgraded versions of the base elementals. They are independent encounters with their own spawn points, their own activation steps, and their own loot tables. Treating them as "just another Red or Blue run" is the most common reason players report failing to trigger the fight at all. The holo shrines use a different altar type, which is why the activation animation looks unfamiliar the first time you see it.
| Encounter | Base Counterpart | Spawn Location | Activation Difference |
|---|---|---|---|
| Holo Red | Red Elemental | Far east lava chamber, beyond the Red shrine | Requires lighting a holo torch before the altar accepts input |
| Holo Blue | Blue Elemental | Hidden ice cavern past the waterfall, deeper path | Requires stepping on three frost plates in order |
Holo Red Activation Walkthrough
The Holo Red shrine sits past the standard Red shrine, deeper into the lava biome. Most players reach it by following the lava channel east until the walls turn dark orange, then dropping through the cracked floor tile at the far end. Inside, you will find a single holo torch next to a red altar. Light the torch first, then interact with the altar, and the Holo Red spawns immediately.
| Step | Action | Notes |
|---|---|---|
| 1 | Follow the lava channel east past the Red shrine | Walls turn dark orange as the path continues |
| 2 | Drop through the cracked floor tile at the far end | The fall is longer than the standard Red entrance |
| 3 | Find the holo torch next to the red altar | The torch is unlit until you approach |
| 4 | Light the holo torch to unlock the altar | Skipping this leaves the altar uninteractable |
| 5 | Interact with the altar to summon Holo Red | Fights at a faster pace than the base Red |
| 6 | Defeat Holo Red to receive the Holo Red Sword | Higher damage and longer burn proc than the base version |
Holo Blue Activation Walkthrough
Holo Blue lives behind the standard Blue waterfall, but the path keeps going past the alcove where the base Blue spawns. You will need to climb the second set of ice steps, then follow the narrow frozen path until you reach a chamber with three frost plates on the floor. Step on them in order (left, right, center) to unlock the blue altar at the back of the room.
| Step | Action | Notes |
|---|---|---|
| 1 | Enter the waterfall alcove past the base Blue shrine | Same entrance, do not stop at the standard altar |
| 2 | Climb the second set of ice steps | Slip damage is small but adds up if you take your time |
| 3 | Follow the narrow frozen path | Watch for falling icicles, they deal chip damage |
| 4 | Step on the three frost plates in order | Left, right, center, wrong order resets the plates |
| 5 | Interact with the blue altar to summon Holo Blue | Spawns on the far platform, not directly in front |
| 6 | Defeat Holo Blue to receive the Holo Blue Sword | Strongest base elemental sword in the game |
The Holo Blue Sword is widely considered the best all-around elemental weapon for PvE content, because its slow proc has a long duration and works on every enemy type. According to the Vortex Shadow community video, players who clear all five elementals in a single session report roughly a 40% boost in clear speed on the next boss run, which is a strong incentive to plan an efficient route from the start.
Recommended Elemental Run Order and Tips
Most players run the elemental shrines in a specific order to minimize backtracking. Community-tested routes consistently recommend Red, Blue, Green, then Holo Red and Holo Blue last, because the holo fights are noticeably harder and benefit from the practice you build up on the base trio. The Poly Loot Quest Guide is worth checking if any of the elemental shrine interactions feel stuck, because some NPC quests gate access to the deeper holo arenas.
| Order | Elemental | Reason |
|---|---|---|
| 1 | Red | Closest to spawn, easiest activation |
| 2 | Blue | Same general direction, pairs naturally with Red |
| 3 | Green | Side trip south, but the poison proc is worth the detour |
| 4 | Holo Red | Builds on Red practice, lava channel route is familiar |
| 5 | Holo Blue | Hardest of the five, save the best for last |
Route Prep for All Five Spawns
Before you start a full elemental sweep, make sure your loadout is ready. Each fight is a single boss encounter, but the travel between shrines is where most players lose time, either by dying to mini-enemies or by taking chip damage that compounds across the run. A small amount of prep cuts ten to fifteen minutes off a full clear.
-
Stamina at full or near full — you will be climbing, dropping, and swimming between shrines
-
At least one healing consumable — the holo fights can chunk your health if you whiff a dodge
-
A weapon that does not rely on elemental procs — save the elemental swords for after the run
-
Free inventory space — each shrine drops a sword, and you cannot skip a drop mid-fight
Common Mistakes to Avoid
A few recurring mistakes show up across every community guide video on the poly loot all elementals roster. Avoiding them saves reruns and keeps the route tight. Players who are still working through the early bosses should also look at the Poly Loot Boss Guide for general fight tips that apply to elemental encounters too.
-
Skipping the holo torch at the Holo Red shrine — the altar stays locked until it is lit
-
Stepping on the frost plates in the wrong order — the Holo Blue shrine resets, which costs you a full run back through the cavern
-
Trying to fight the Green Elemental before lighting the vine stones — the encounter will not trigger, and most players assume the shrine is bugged
-
Forgetting that the holo variants are separate encounters — the holo swords do not drop from the base fights, even if the base sword is already in your inventory
Frequently Asked Questions
How many elementals are there in Poly Loot?
There are five working elemental spawns in Poly Loot: Red, Blue, Green, Holo Red, and Holo Blue. The Holo variants are independent encounters with their own shrines, not upgraded versions of the base elementals, and each one drops a unique sword that does not exist in the base loot table.
What is the fastest way to find the Red Elemental in Poly Loot?
Head east from spawn to the cracked stone bridge, drop into the lava channel below, and locate the half-buried arch on the north wall marked by two unlit torches. Light both torches, interact with the altar at the back of the small chamber, and the Red Elemental spawns on the raised platform in front of you.
Do the Holo Red and Holo Blue swords replace the base elemental swords?
No, the Holo Red and Holo Blue swords are separate items that do not replace the base Red or Blue sword drops. They sit in their own inventory slot and offer higher damage plus longer proc durations, which is why most players treat them as end-state weapons for elemental builds.
Can the elemental shrines be completed in any order?
Yes, all five elemental shrines can be completed in any order, and the game does not enforce a sequence. Community-tested routes recommend running Red, Blue, Green, Holo Red, and Holo Blue in that order to minimize backtracking, because the holo shrines sit on the far side of the map from the base trio.
Where can I find more information about the Holo Blue sword stats?
The Holo Blue sword has the strongest base damage of any elemental weapon and applies a slow proc on hit. For a deeper breakdown of its stats and how it compares to the base Blue sword, the Poly Loot Holo Blue stats guide covers the difference in detail.